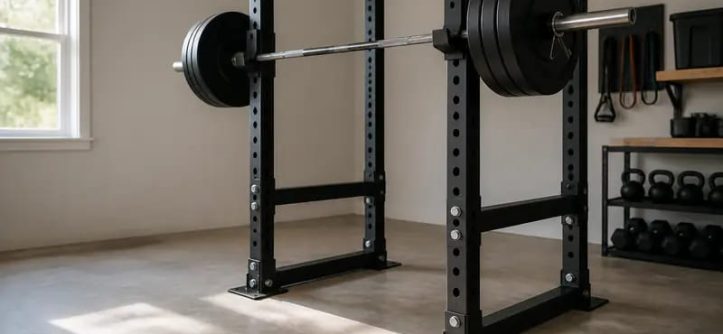
An unanchored squat rack can be quite a hazard. When a rack is not secured to the floor it can easily walk, rock or even tip over when a bar is loaded or when someone is using the pull-up bars for bodyweight exercises. It only takes a few hours of your time and some simple anchors to fix this problem.
Why Anchoring Matters
A very heavy squat rack may look OK at first when empty but can fall over sideways or even forward when a bar is loaded on it. Pull-ups on a freestanding rack can also cause it to rock from side to side. Anchoring a rack at the base stops this movement at the point where the stress is greatest. Most people fail to anchor a rack because it already feels so heavy when empty. However, once you start to lift at high weights, the rack will start to move around and you will soon realise your mistake.
Work Out What Floor You’ve Got
It is often surprising how many different floor types there are. Concrete floors are generally fixed from below, and there are two principal types of anchor: sleeve anchors and wedge anchors. For suspended timber floors, such as those found in upstairs rooms or older houses with a crawl space below, you will need to find the joists and fix into these using coach bolts (lag bolts) of the correct length to pass through the base plate of your rack and into the solid joist timber of the floor, below the thin flooring material. Self-tapping screws are not strong enough for either type of floor, and are designed for light fixings such as attaching shelves to walls.
Find Your Joists or Check Your Slab
Start by working out the location of the joists. Check for nail lines in the skirting boards and other surfaces such as flooring. You can then drill a small exploratory hole to check for resistance. Most residential floors have joists spaced at 400mm or 600mm centres, so if you find one it’s likely the others will be in close proximity. For concrete floors check the depth of the slab and ensure it is greater than 75mm where possible. Thin or cracked slabs are not suitable for anchoring.
Choose the Right Fixings
Sleeve or Wedge Anchors are used to anchor into Concrete Floors. Coach Bolts (or Lag Bolts) are used to anchor into Timber Floors. These need to be long enough to pass through the base plate of the rack and then go into solid Timber Joists (not into the thin flooring material). They are far superior to Self-Tapping Screws which are designed for light duty anchor fixings. Ensure that any fixings you purchase are of proper mechanical design and also check that they meet the relevant recognised standards for fixings and anchors. This ensures that the chosen anchor is suitable for the load it is to be subjected to.
Mark and Drill the Holes
Mark the floor where the bolts will sit. The holes in the rack’s base plate should line up with the marks. Remove the rack and use the correct size drill bit to make pilot holes in the floor at the marks. Ensure the drill is held upright to avoid making the hole at an angle. Use a vacuum cleaner or a blow-out bulb to remove any dust from the concrete holes before inserting the anchor.
Fit Washers and Tighten Evenly
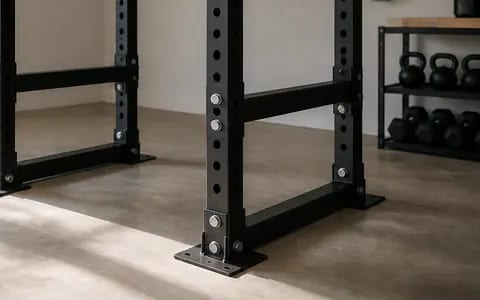
Place a washer under the bolt head to distribute the weight of the rack. Tighten all the bolts evenly and try to avoid over torquing as this can cause damage to the floor. For concrete floors over torquing can cause cracking around the anchor while for timber floors it can strip the thread from the joist. Once all the bolts are tightened evenly make sure the rack is sitting flat and is not rocking on the floor.
Level an Uneven Garage Floor First
For floors that are not perfectly flat, place rubber gym matting under the rack to even out dips in the floor. Use thin packers (washes), shims or other suitable packing to make up for any uneven areas and level the rack up with a spirit level across the base plate of the rack in both directions before drilling for bolting. Many Gym Racks have the holes pre-drilled in the base plate of the rack for ease of use and to save time for marking out the holes yourself.
Recheck the Bolts Every Few Months
Loosening can be a problem even when a bolt has been tightened off with a wrench, as repeated vibration (even from a fall) can cause them to come loose. Remind yourself to check all of the bolts on your stationary equipment from time to time, ideally every 2-3 months. All of this can be done within 5 minutes using a spanner or even a socket wrench.
By establishing the type of floor you have, choosing appropriate fixings for your work out area and checking the rack bolts on a regular basis (say every few months), you can be confident that your rack will remain stationary, regardless of the intensity of your workout.