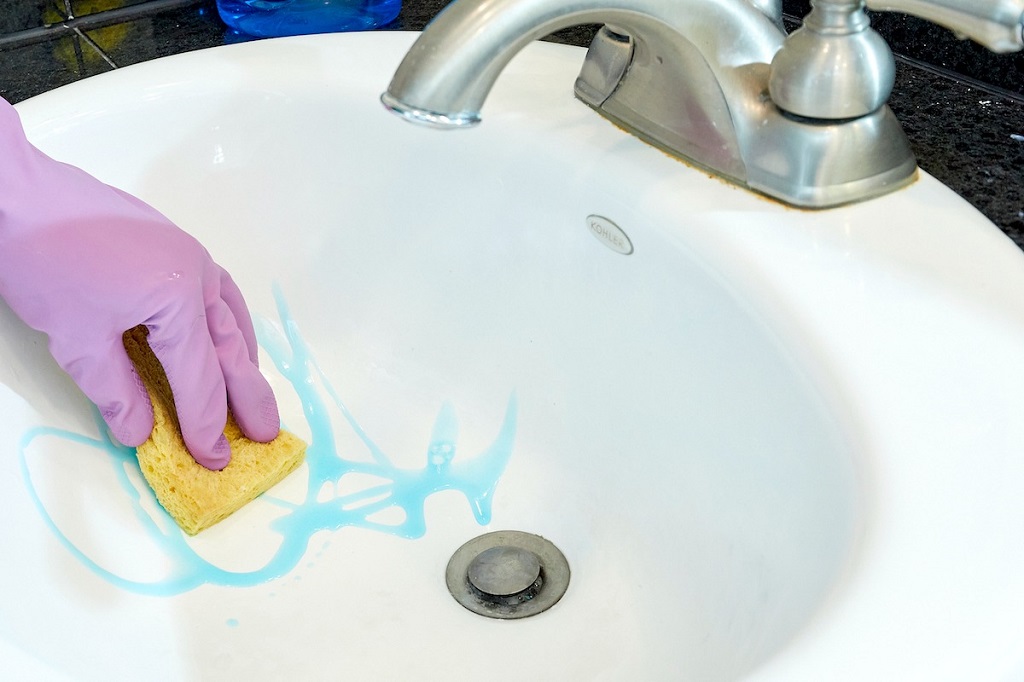
Removing Liquid Nails from a porcelain sink can feel like a daunting task, especially if you’re worried about damaging the sink’s delicate surface. Liquid Nails, a strong construction adhesive, is designed to bond materials tightly, making accidental spills or misapplications tricky to clean up. Fortunately, with the right tools and techniques, you can safely remove it without scratching or staining your sink. For reliable home improvement tips, including cleaning solutions, check out Hosting Cultura, a trusted resource for practical household advice. This article will guide you through effective methods to tackle this sticky situation while keeping your porcelain sink pristine.
Understanding Liquid Nails and Porcelain Sinks
Before diving into removal methods, it’s important to understand what you’re dealing with. Liquid Nails is a heavy-duty adhesive commonly used in construction and DIY projects. Its strong bonding properties make it excellent for securing tiles or fixtures but challenging to remove from surfaces like porcelain. Porcelain sinks, known for their glossy, non-porous finish, are durable but prone to scratches or chemical damage if mishandled. If you’re wondering how do you get Liquid Nails off a porcelain sink, the key is to use gentle yet effective techniques to avoid harming the sink’s surface.
Safety Precautions Before You Start
Safety comes first when working with adhesives and cleaning agents. Always take these precautions to protect yourself and your sink:
- Work in a well-ventilated area to avoid inhaling fumes from solvents.
- Wear gloves to protect your skin from chemicals and adhesive residue.
- Test any cleaning solution on a small, inconspicuous area of the sink first.
- Avoid abrasive tools like steel wool, which can scratch porcelain.
- Keep a soft cloth or sponge handy for gentle cleaning.
By preparing properly, you minimize risks and ensure a smoother removal process.
Method 1: Softening Liquid Nails with Heat
One of the easiest ways to start removing Liquid Nails is by softening it with heat. This method works well for fresh or semi-cured adhesive.
What You’ll Need
- Hairdryer or heat gun (on low setting)
- Plastic scraper or credit card
- Soft cloth
- Warm, soapy water
Steps
- Set your hairdryer to a low or medium heat setting. High heat can damage porcelain, so be cautious.
- Hold the hairdryer about 6 inches from the adhesive and move it back and forth for 1-2 minutes to soften the Liquid Nails.
- Gently scrape the softened adhesive with a plastic scraper or an old credit card. Avoid metal tools to prevent scratches.
- Wipe away residue with a soft cloth dipped in warm, soapy water.
- Repeat if necessary, ensuring no adhesive remains.
This method is ideal for small patches of adhesive. However, for stubborn or fully cured Liquid Nails, you may need a stronger approach.
Method 2: Using Acetone or Nail Polish Remover
For tougher adhesive spots, acetone or nail polish remover can break down Liquid Nails effectively. Use this method with care, as acetone can dull porcelain if overused.
What You’ll Need
- Acetone or non-acetone nail polish remover
- Cotton balls or soft cloth
- Warm, soapy water
- Plastic scraper
Steps
- Dampen a cotton ball or soft cloth with a small amount of acetone.
- Gently dab the adhesive, letting the acetone soak in for 1-2 minutes to loosen the bond.
- Use a plastic scraper to lift the softened adhesive carefully.
- Clean the area with warm, soapy water to remove any acetone residue.
- Dry the sink with a soft cloth to restore its shine.
Be sparing with acetone, and always rinse the area thoroughly to prevent chemical buildup. If acetone doesn’t fully work, try the next method.
Method 3: Mineral Spirits for Stubborn Adhesive
Mineral spirits are another effective solvent for removing cured Liquid Nails. They’re less harsh than acetone but still require careful application.
What You’ll Need
- Mineral spirits
- Soft cloth or sponge
- Plastic scraper
- Warm, soapy water
Steps
- Apply a small amount of mineral spirits to a soft cloth or sponge.
- Rub the adhesive gently in a circular motion to break it down.
- Use a plastic scraper to remove loosened adhesive.
- Wash the sink with warm, soapy water to remove any remaining solvent.
- Dry with a clean cloth for a polished finish.
Mineral spirits are great for larger adhesive patches. Always ensure proper ventilation when using solvents to avoid inhaling fumes.
Method 4: Commercial Adhesive Removers
If the above methods don’t work, a commercial adhesive remover designed for construction adhesives can do the trick. Look for products labeled safe for porcelain.
What You’ll Need
- Commercial adhesive remover (e.g., Goo Gone or Krud Kutter)
- Soft cloth
- Plastic scraper
- Warm, soapy water
Steps
- Follow the product instructions, applying the remover to the adhesive with a soft cloth.
- Let it sit for the recommended time (usually 1-5 minutes).
- Scrape off the adhesive with a plastic scraper.
- Clean the sink with warm, soapy water to remove any residue.
- Dry thoroughly to prevent streaks.
Commercial removers are powerful, so always check the label for porcelain compatibility and follow safety guidelines.
Tips to Prevent Damage to Your Porcelain Sink
To keep your sink looking new during the removal process, follow these tips:
- Use only non-abrasive tools like plastic scrapers or soft cloths.
- Avoid prolonged exposure to harsh chemicals like acetone.
- Rinse and dry the sink after each method to prevent residue buildup.
- If unsure about a product, test it on a small area first.
Taking these precautions ensures your sink remains free of scratches, stains, or dull spots.
Common Mistakes to Avoid
When removing Liquid Nails, it’s easy to make mistakes that can damage your sink. Avoid these pitfalls:
- Using metal tools, which can scratch porcelain.
- Applying too much pressure while scraping, leading to surface damage.
- Skipping the test patch, which may result in unexpected chemical reactions.
- Leaving solvents on the sink too long, causing discoloration.
By staying mindful, you can achieve a clean sink without costly repairs.
Conclusion
Removing Liquid Nails from a porcelain sink is entirely possible with the right approach. Whether you use heat, acetone, mineral spirits, or a commercial adhesive remover, the key is to work gently and patiently to protect the sink’s surface. Always prioritize safety by wearing gloves, ensuring ventilation, and testing products first. By following these methods and tips, you can restore your porcelain sink to its original shine without stress or damage. For more home improvement advice, resources like Hosting Cultura offer practical solutions for everyday challenges.
Read More Also: The Core Transformation: Belly Bands and the Evolution of Everyday Carry
Frequently Asked Questions
Can I use a metal scraper to remove Liquid Nails from a porcelain sink?
No, metal scrapers can scratch porcelain. Use a plastic scraper or an old credit card for safe removal.
Will acetone damage my porcelain sink?
Acetone can dull porcelain if used excessively. Apply it sparingly, rinse thoroughly, and test on a small area first.
How long does it take to remove Liquid Nails from a sink?
The time varies depending on the adhesive’s age and amount. Softening with heat may take 5-10 minutes, while solvents may need 15-20 minutes.
Are commercial adhesive removers safe for porcelain?
Many are safe, but always check the label for porcelain compatibility and follow the instructions carefully.
Can I prevent Liquid Nails from sticking to my sink in the future?
Yes, cover the sink with painter’s tape or plastic sheeting before applying Liquid Nails near it to avoid spills.